Hello BIM fellows
Today we will see how to quickly create walls from floor edges using Dynamo in Revit 2016. This could be useful for Landscape architects as well as Construction architects.
First we need to get all the Floors that are at the same level, this could be done by getting the intersection set between two lists.
The first list contains all floors in the model and the second one contains all the elements at certain level.
Using combination of “Levels” Node, “Categories” Node and “SetIntesection” Node we get such filtration.
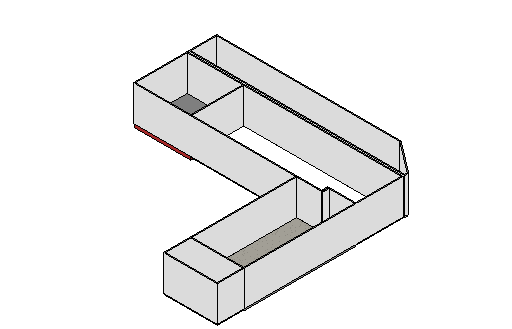
To get the Floor edges we should cut the Floor with a plane and since all floors are almost horizontal we can cut them with the plane of Z axis as its Normal. Once we got the edges the Python Script does its magic.
By using the same Level of the Floors, proper Wall Type and the Floors edges we can so easily draw walls on each edge segment.

The Dynamo workflow can be downloaded from here

could this script be modified to draw a line based family by floor edges?
Please provide your sample family and I’ll see what I can do.
Here you go , thank you.
Sorry but I can’t find any attachments !!
Sorry , lets try this again. if it still does not come through do you have a different email address that I can send it to?
mustafa.salaheldin@yahoo.com
finish wall create not finish other type. but other wall/ .???
Please clarify your question.
thanks for answering. your Dynamo requires you to specify the type of finish wall. but it creates the same wall as the main one. how to make to create a new type of finish wall
how to make your new walls to connect with the old as in the example link https://drive.google.com/open?id=1-ty7J_qc78DGksQ5jh-NaDtQYUsP8zaO in FINISHING learning MODECAL_001 .dyn
ОТДЕЛКА учусь MODECAL_001 .dyn in the MODECALL pocket is a very difficult product. I need to finish the walls on the floor. then their join with old walls to cut out Windows and doors. and then I want the old wall type to copy into the new finish wall in comments